Monday, July 29, 2013

Back To School DIY: Chic Composition Notebooks

Sorry guys I really didn't mean to abandon you but I haven't had that many ideas for a good post until now! This D.I.Y will be about transforming your old composition notebooks, into more stylish and classy books!


Supplies:
  1. Old/New Composition Notebooks
  2. Scrap booking Paper (Purchase from your local craft store)
  3. Satin Mod Podge (Purchase from your local craft store)
  4. Mod Podge Brush (You should find this near the actual Mod Podge)
  5. Pencil
  6. Marker
  7. Glue
  8. Scissors
  9. Card Stock
  10. Ruler


Below is the Header for your notebook. This is where you will write who the book belongs to, your teacher, the subject, etc.
Header For Your Composition Notebook

If you do not understand anything in the video leave a comment below and I try to get back to you as soon as possible.

Sunday, June 2, 2013

Crafty Ideas for the Summer


I found this pinterest board and I thought that it was really cool. So I pulled out some tutorials from that board and from different websites, and thought that you guys would like this!! I will be doing some of these tutorials, but since it is summer I will most likely have more time to do Crafts With Colbie blogging. Sorry I have not been blogging in a long time it is just that it has been a long week and a half.
100+ Ideas for Free and Frugal Summer Fun
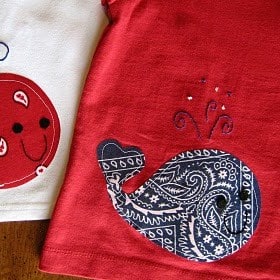
Whale Applique' from Red Ted Art
Rainbow Tie-dyed T-shirts
DIY neon necklace
Neon Necklace from The Style Dossier

Wednesday, May 22, 2013

DIY: Polymer Clay Bow Earrings


I made these really cool earrings the other day, 
so I have two videos I would like to show to you guys. They both show the same things, but they should different ways of how to do them! So I hope you enjoy, and enjoy the pictures!!

Materials:
  • Jump Rings
  • Earring Hooks
  • Polymer Clay (I used pink but you can use whatever color you want)
  • Eye Pin
  • Clear Nail Polish(I used Sally Hansen, but you can use what you have, including glaze. Do not use any nail polish with an oil base.)
Directions

Mustache shape!!!!! (you have to watch the video to understand)
 Jump Rings, and Earring Hooks!
 They Are Connected!
  Glaze!!!!!!

 They Look Good Don't They!!!
Don't Forget to Like My Videos, and to Subscribe!!!

Tuesday, May 14, 2013

Tin Can Lanterns D.I.Y

I made these really cool tin can lanterns for mother's day 
and they really light up my backyard deck!
Materials:
  • recycled tin cans
  • hammer
  • nail
  • spray paint
  • tea light candle
  • WD-40 (optional)
Directions
  1. Wash out tin cans an remove all paper. Then take your WD-40 and spray on any glue spots from the paper and wipe off.
  2. Fill your cans with water and let the freeze
    (I put mine in a container so that the water would not fall out in the freezer)

  3. After removing the can from the freezer you'll notice a big bulge in the bottom. This comes from freezing water in it. But, it can be fixed! Just pound it down with a hammer so that it sits flat.
  4. Make your design in your can with your hammer and nail
  5. Spray paint them with the color of your choice, and let them dry

  6. Place your tea light candle at the bottom of your can
  7. Now you're ready to enjoy your tin can lantern(s)!!
Below are just some pictures of what two of them look like in the canopy!!


(If you are wondering the "L" is for Lofton because that is my last name)
Finished Product!!
I got bored while they were drying so this is what happened. :P


Wednesday, May 1, 2013

Simple Earrings

I made some really cool earrings, and they are really easy so I am going to share!
Tools:
  • Beads (any kind you want, 1 small, 1 medium, on flat which is smaller) 
  • 1 Eye pin
  • 1 Flathead pin
  • Earring hooks
  • Round Headed Pliers 
Directions:
  1. Take one small bead and place at the bottom of your Flathead pin, and place the medium (pink) on on also
  2. Curl the end of that (not all the way because you have to curl another one onto it)
  3. Take your eye pin and place a smaller bead (yellow) up the bottom of the eye pin, and curl the flat head pin and the eye pin together 
  4. Slip the earring hooks into the eye pin, and tighten if needed
  5. Enjoy!


This is how long they are on me!


Sunday, April 28, 2013

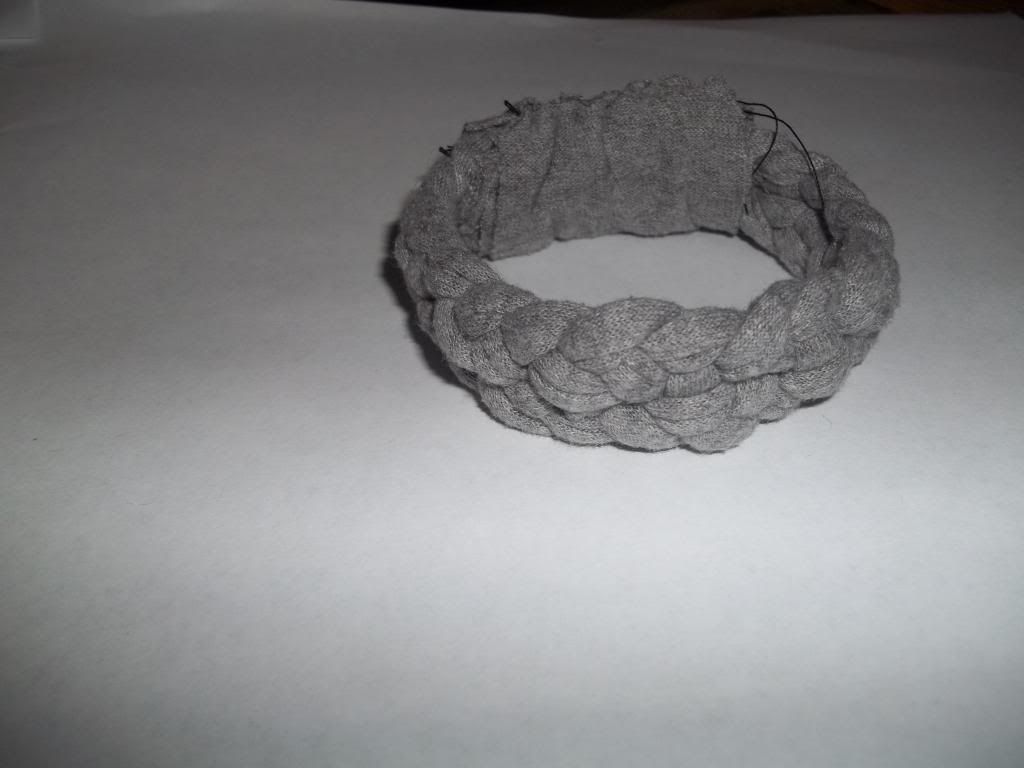
5-Strand Braided Bracelet

I made this bracelet today, it was quite difficult but I managed. 
Now I am going to share the tutorial with you guys!
Pin It!
Directions for the Bracelet!
    Pin It!
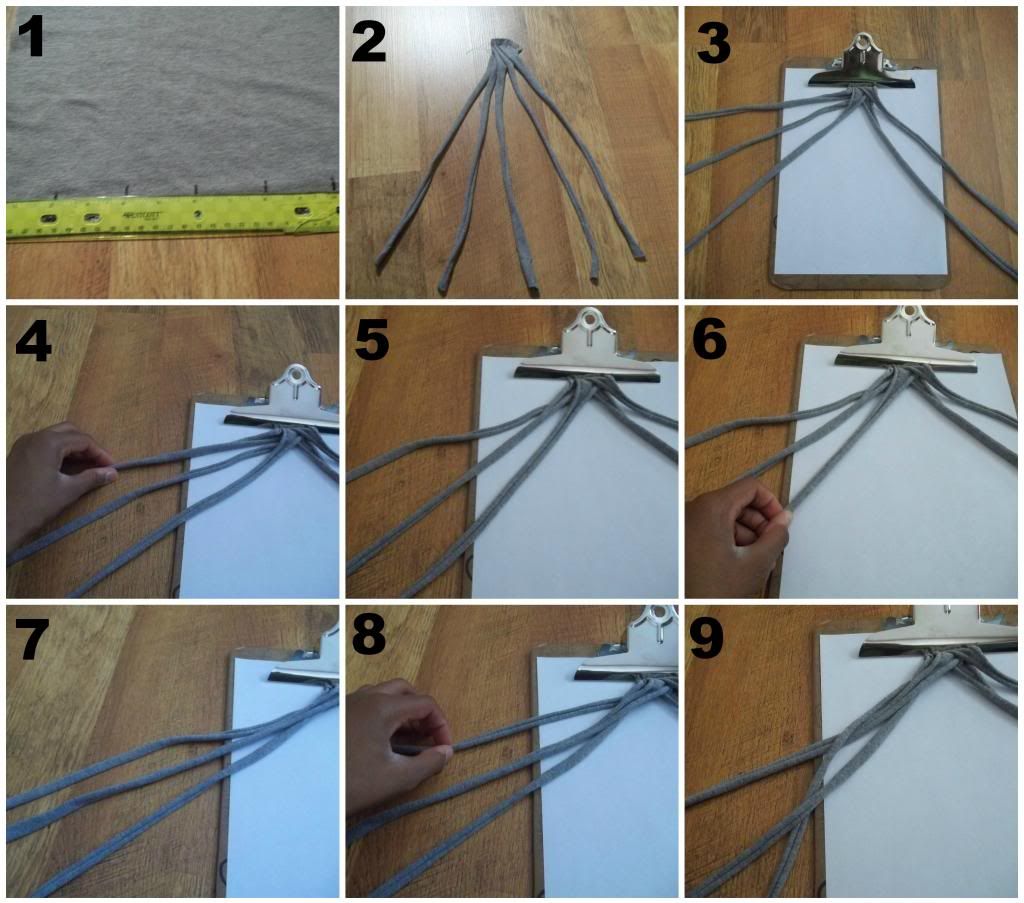
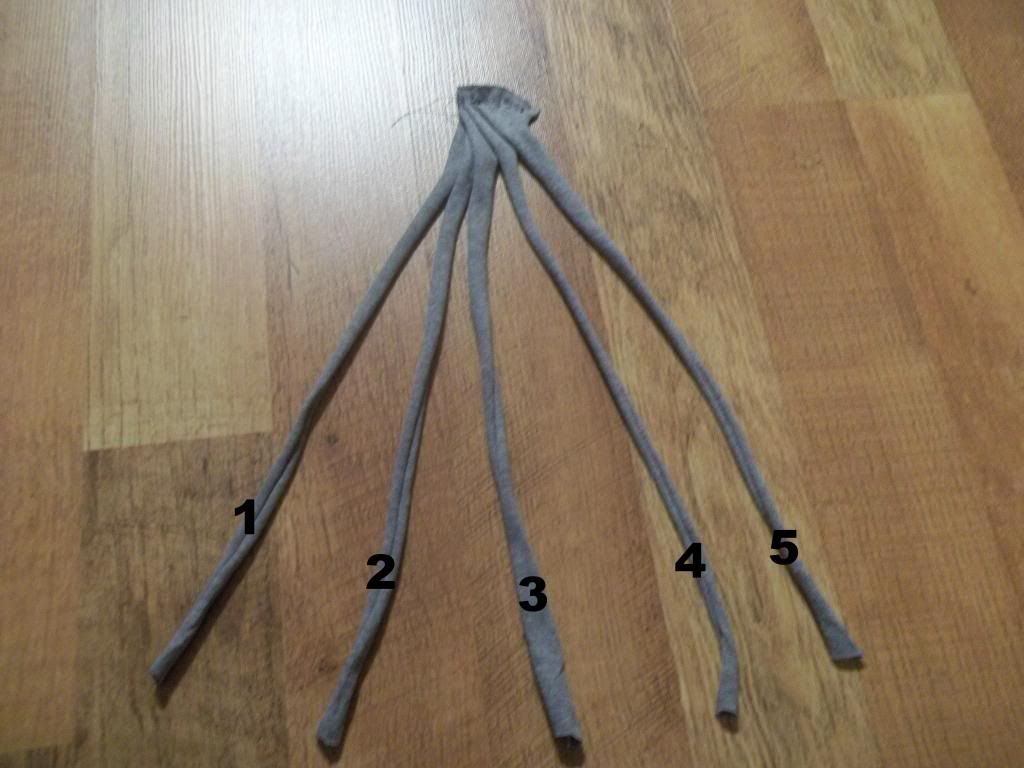
  1. Measure your t-shirt. Make 5 strands that are 2 inches each.
  2. Sew your strands together and stretch out the strands so they curl at the ends.
  3. Use a clipboard or something sturdy to keep in place. Then separate 3 strands and 2 strands
  4. Grab strand 1
  5. Cross it over strand 2
  6. Grab strand 3
  7. Crossover strand 1 (it is strand 1 now because you crossed it over.)
  8. Grab strand 3 (strand 3 was crossed over strand 2)
  9. Crossover strand 1, and under strand 2
  10. Move strand 3 over to the other two strand sitting on the other side, and repeat 
 Directions for finishing bracelet!
    Pin It!
  1. When you are at your desired length sew the ends (no need to make a knot or anything just sew together)
  2. Cut of any extra
  3. Sew the two ends together
  4. To cover up sewing "traces", get an extra piece of your cloth and sew around the part where you sewed the two ends together.(Make sure you sew on the inside of the bracelet-so no one can see it.
  5. Enjoy!


Tuesday, April 16, 2013

Been awhile...since I have blogged!

I had a really tough weekend with my girl scout troop, we went on a hiking trip and I have not been able to do anything on my two blogs. So I thought I would catch up on things..........
{{What I have planned}}
1) Can Tab Bracelet
2) Handmade Headbands or bracelet 
Marked Out Means I and Finished With Them!

B.T.W: I have updated my blog now I have a button, the appearance is better, and everything in between! You can find this @ craftswithcolbie.blogspot.com!
Don't forget to follow, and add me on Google+.
                    
Follow my blog with Bloglovin
Visit My Second Blog

Saturday, April 6, 2013

Starburst Bracelet Improved

I improved the starburst candy wrapper bracelet! I added jump rings and a lobster clasp instead of just a pin. I though this made the bracelet look nicer in a way. It was pretty difficlut to get the jump rings into the last starburst wrapper though. I had to kinda force it through, but it worked so that was good!  Hope you like the pictures- Colbie :-D

Friday, April 5, 2013

Charm Update

I made a couple of new charms over this past week. Two doughnuts and a bear! I didn't do a tutorial on any of the new charms though :(. I think I am going to do another post on how to make a bowl of ice-cream charm (which will look so cool). I will also be doing a post on my upcoming charm bracelet!!! I hope you guys like the pictures. Thanks-Colbie

Friday, March 29, 2013

D.I.Y: Polymer Clay Octopus

Awesomeness!!! Everyone I have a tutorial, on how to make this cool polymer clay Octopus!!!! I finally got to edit the video, and it looks really nice, so check it out, and try out the tutorial!!!

Sunday, March 24, 2013

Starburst Candy Wrapper Bracelet


Pretty hectic few days so far, I have not been able to post :( I'm sorry for all my readers out there. Anyways I know I said that I was doing polymer clay for my next project, but I found this D.I.Y online, and I really wanted to do it. Since the best part of it is that you get to eat candy!! I have bought the polymer clay, but while I was at the store I forgot to buy my "little-hoop-thingies" to make the charms. (I am so forgetful, and re tarted, I know and I am soooo sorry).....Directions on how to make this bracelet are below!!!Thanks for hanging in there with me. Ok I am going to be really lazy with you guys right now (sorry that's me), I am going to put SoCrafttastic's video from YouTube on her for you guys to view, instead of me making a video. She explains this project really well and if you like her Subscribe to her channel like I did. Enjoy!!!~Colbie


Friday, March 15, 2013

Polymer Clay


Look how cute they look, and the different things you can make. Waaaa. I am dying, I want polymer clay. Please help me with my problem, please I am begging comment for me anywhere I can get it!!

I really want to make clay charms, but I don't know a good place to buy it, or a good brand I could use. :( I really want a place where I can find it. Please anyone help me find a good brand, and a good store that I can buy polymer clay!!

Sunday, March 10, 2013

Finished Product (Drawstring)


So this is my sister's bag all finished!!!! This is way easier than you think so don't think "oh I can't do that it's to hard for my liking". Because in reality it is a really nice bag with lots of space. As you can see a Build-A-Bear can fit in the bag with space to spare! And it can be displayed as a purse or backpack! 
Enjoy these pictures!!


Needle Felting D.I.Y

Part 1 Needle Felting


Part 2 Needle Felting


♥I would suggest going to full screen to see the video, because the 2nd video does not show the supply list all the way through, so you have to go to full screen to see it!!!
As you can see my ironing board has served it's years :)

♥You guys can find these felting products at Michael's, I got the Dimensions Felting Needle refills (I got the fine tip), and the Dimensions Wool Felting Pack.
♥Good Luck Felting!!!!!!!!
If you have any questions about needle felting contact me at clmay27@gmail.com


This is what the Felting products look like!!
                                                                   Wool
                                                                     Fine Tip Needles


Wooly Wonders Drawstring Bag

      I This is an awesome pattern that I found on Ravelry.  It is a knitting and crochet community, and everyone who signs up can share patterns and such, it is really neat! Anyways I found this really cool bag that my sister made, and I wanted to share the pattern with you all. 

Just go to this website: http://www.woolywonder.com/freebies/wonderbag/ to find out the step-by-step direction on how to make this wonderful bag!
For more Knitting ideas and patterns: https://www.ravelry.com/account/login

Wooly Wonders Wonder Bag


Knitted below by: Kennedy Lofton 


As for the Drawstring's eye-cord (thing you pull) I just crochet the cord with some really cool and old yarn I had. Anyways the eye-cord is about 2 feet!
Directions on how to crochet


Related Posts Plugin for WordPress, Blogger...