Wednesday, May 22, 2013

DIY: Polymer Clay Bow Earrings


I made these really cool earrings the other day, 
so I have two videos I would like to show to you guys. They both show the same things, but they should different ways of how to do them! So I hope you enjoy, and enjoy the pictures!!

Materials:
  • Jump Rings
  • Earring Hooks
  • Polymer Clay (I used pink but you can use whatever color you want)
  • Eye Pin
  • Clear Nail Polish(I used Sally Hansen, but you can use what you have, including glaze. Do not use any nail polish with an oil base.)
Directions

Mustache shape!!!!! (you have to watch the video to understand)
 Jump Rings, and Earring Hooks!
 They Are Connected!
  Glaze!!!!!!

 They Look Good Don't They!!!
Don't Forget to Like My Videos, and to Subscribe!!!

Tuesday, May 14, 2013

Tin Can Lanterns D.I.Y

I made these really cool tin can lanterns for mother's day 
and they really light up my backyard deck!
Materials:
  • recycled tin cans
  • hammer
  • nail
  • spray paint
  • tea light candle
  • WD-40 (optional)
Directions
  1. Wash out tin cans an remove all paper. Then take your WD-40 and spray on any glue spots from the paper and wipe off.
  2. Fill your cans with water and let the freeze
    (I put mine in a container so that the water would not fall out in the freezer)

  3. After removing the can from the freezer you'll notice a big bulge in the bottom. This comes from freezing water in it. But, it can be fixed! Just pound it down with a hammer so that it sits flat.
  4. Make your design in your can with your hammer and nail
  5. Spray paint them with the color of your choice, and let them dry

  6. Place your tea light candle at the bottom of your can
  7. Now you're ready to enjoy your tin can lantern(s)!!
Below are just some pictures of what two of them look like in the canopy!!


(If you are wondering the "L" is for Lofton because that is my last name)
Finished Product!!
I got bored while they were drying so this is what happened. :P


Wednesday, May 1, 2013

Simple Earrings

I made some really cool earrings, and they are really easy so I am going to share!
Tools:
  • Beads (any kind you want, 1 small, 1 medium, on flat which is smaller) 
  • 1 Eye pin
  • 1 Flathead pin
  • Earring hooks
  • Round Headed Pliers 
Directions:
  1. Take one small bead and place at the bottom of your Flathead pin, and place the medium (pink) on on also
  2. Curl the end of that (not all the way because you have to curl another one onto it)
  3. Take your eye pin and place a smaller bead (yellow) up the bottom of the eye pin, and curl the flat head pin and the eye pin together 
  4. Slip the earring hooks into the eye pin, and tighten if needed
  5. Enjoy!


This is how long they are on me!


Sunday, April 28, 2013

5-Strand Braided Bracelet

I made this bracelet today, it was quite difficult but I managed. 
Now I am going to share the tutorial with you guys!
Pin It!
Directions for the Bracelet!
    Pin It!
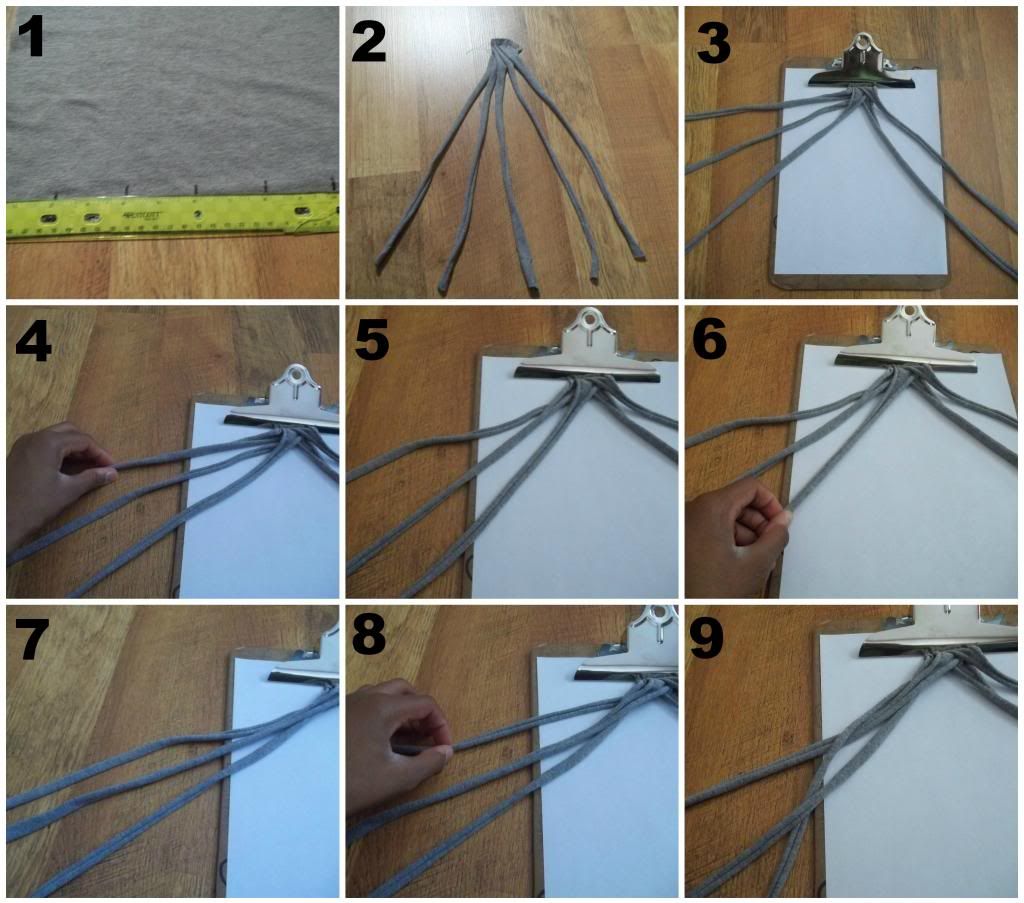
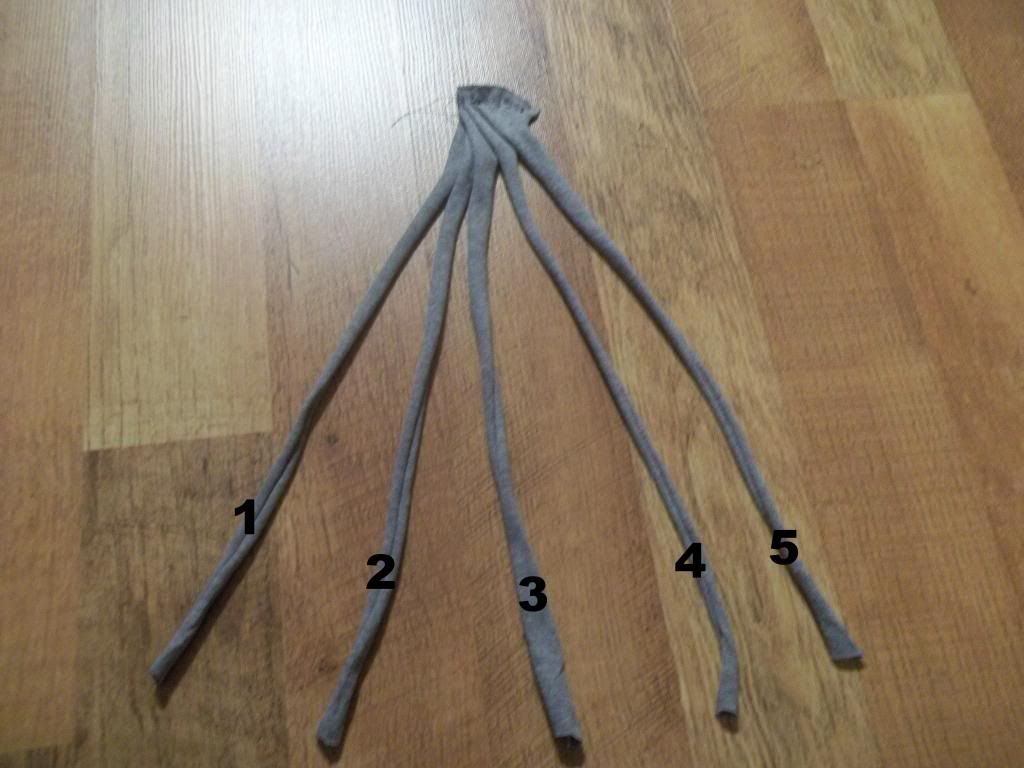
  1. Measure your t-shirt. Make 5 strands that are 2 inches each.
  2. Sew your strands together and stretch out the strands so they curl at the ends.
  3. Use a clipboard or something sturdy to keep in place. Then separate 3 strands and 2 strands
  4. Grab strand 1
  5. Cross it over strand 2
  6. Grab strand 3
  7. Crossover strand 1 (it is strand 1 now because you crossed it over.)
  8. Grab strand 3 (strand 3 was crossed over strand 2)
  9. Crossover strand 1, and under strand 2
  10. Move strand 3 over to the other two strand sitting on the other side, and repeat 
 Directions for finishing bracelet!
    Pin It!
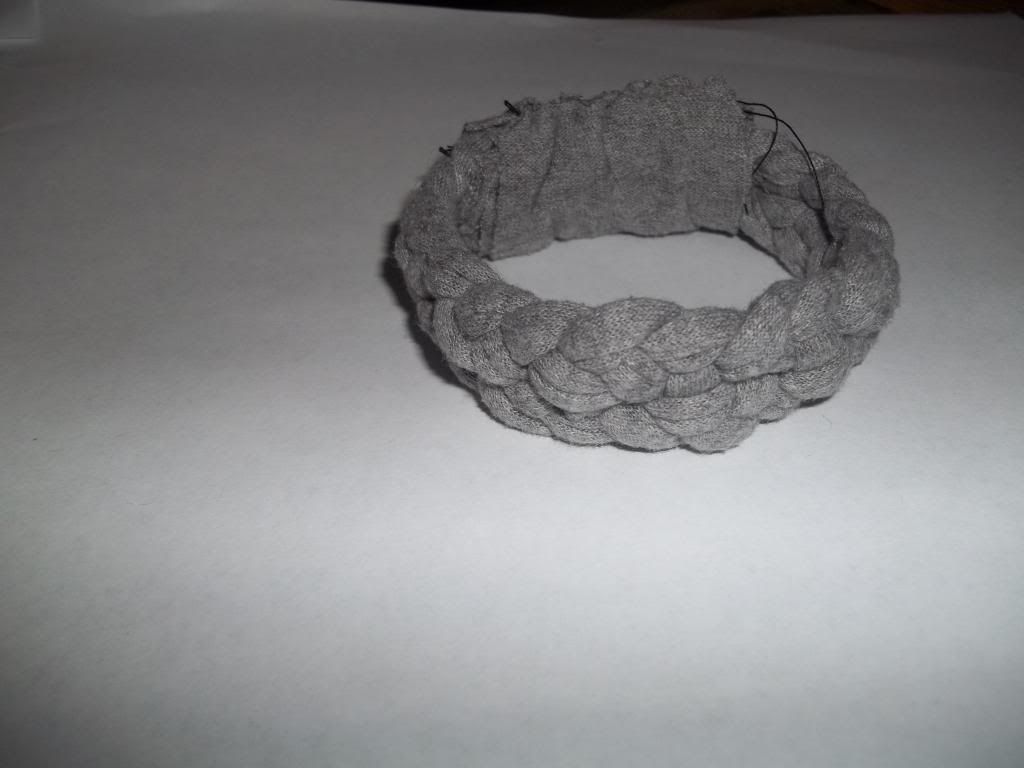
  1. When you are at your desired length sew the ends (no need to make a knot or anything just sew together)
  2. Cut of any extra
  3. Sew the two ends together
  4. To cover up sewing "traces", get an extra piece of your cloth and sew around the part where you sewed the two ends together.(Make sure you sew on the inside of the bracelet-so no one can see it.
  5. Enjoy!


Tuesday, April 16, 2013

Been awhile...since I have blogged!

I had a really tough weekend with my girl scout troop, we went on a hiking trip and I have not been able to do anything on my two blogs. So I thought I would catch up on things..........
{{What I have planned}}
1) Can Tab Bracelet
2) Handmade Headbands or bracelet 
Marked Out Means I and Finished With Them!

B.T.W: I have updated my blog now I have a button, the appearance is better, and everything in between! You can find this @ craftswithcolbie.blogspot.com!
Don't forget to follow, and add me on Google+.
                    
Follow my blog with Bloglovin
Visit My Second Blog

Saturday, April 6, 2013

Starburst Bracelet Improved

I improved the starburst candy wrapper bracelet! I added jump rings and a lobster clasp instead of just a pin. I though this made the bracelet look nicer in a way. It was pretty difficlut to get the jump rings into the last starburst wrapper though. I had to kinda force it through, but it worked so that was good!  Hope you like the pictures- Colbie :-D

Friday, April 5, 2013

Charm Update

I made a couple of new charms over this past week. Two doughnuts and a bear! I didn't do a tutorial on any of the new charms though :(. I think I am going to do another post on how to make a bowl of ice-cream charm (which will look so cool). I will also be doing a post on my upcoming charm bracelet!!! I hope you guys like the pictures. Thanks-Colbie
Related Posts Plugin for WordPress, Blogger...